

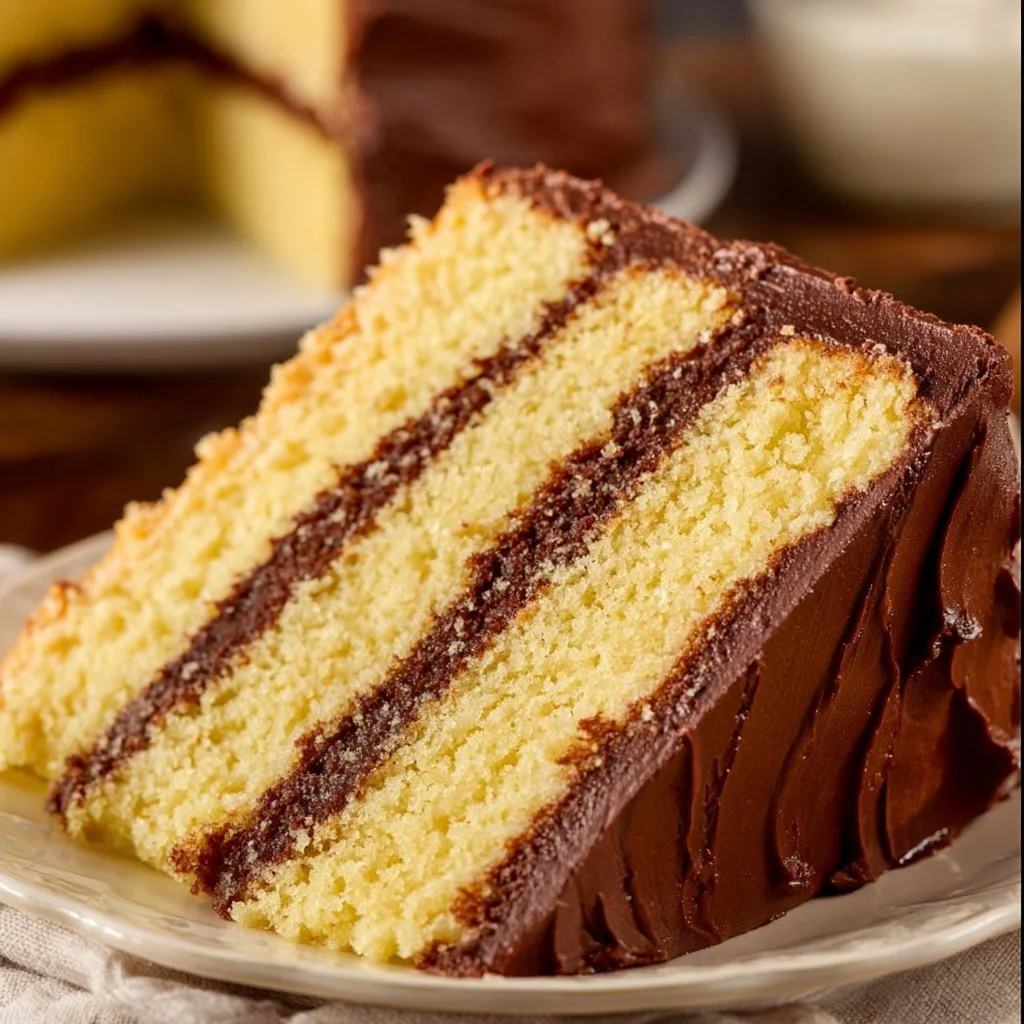
Yellow Birthday Cake with Chocolate Frosting
A classic yellow birthday cake with rich chocolate frosting is the perfect centerpiece for any celebration. This cake is moist and fluffy, offering a delightful balance of buttery sweetness and the deep richness of chocolate. The aroma of the cake baking fills your kitchen with warmth, inviting everyone to gather and celebrate. Whether it’s a child’s birthday party or an adult celebration, this cake promises joy and satisfaction with every slice. The festive layers are not just eye-catching; they create an unforgettable taste experience that will leave your guests wanting more.
Ingredients
- 2 cups all-purpose flour: This forms the base of the cake to give it structure and stability.
- 1 ½ cups granulated sugar: Adds sweetness and helps with the cake’s texture.
- ½ cup unsalted butter, softened: Provides rich flavor and moisture.
- 1 cup milk: Keeps the cake tender and adds moisture.
- 3 ½ teaspoons baking powder: Acts as a leavening agent to help the cake rise.
- 1 teaspoon vanilla extract: Enhances the overall flavor with warmth and sweetness.
- ½ teaspoon salt: Balances the sweetness and enhances flavors.
- 4 large eggs: Adds richness and helps bind the ingredients for a stable batter.
- 1 cup unsweetened cocoa powder: Provides the rich chocolate flavor for the frosting.
- 1 cup unsalted butter, softened (for frosting): Gives the frosting a creamy texture and rich taste.
- 4 cups powdered sugar: Sweetens the frosting and gives it a smooth consistency.
- ½ cup heavy cream: Adds richness and helps achieve a fluffy frosting.
- 1 teaspoon vanilla extract (for frosting): Adds depth and complements the chocolate flavor.
Step-by-Step Instructions
-
Preheat your oven to 350°F (175°C) and grease and flour two 9-inch round cake pans to prevent sticking.
-
In a large mixing bowl, cream together the softened butter and granulated sugar until the mixture is light and fluffy.
-
Add the eggs one at a time, ensuring you mix well after each addition. Then, stir in the vanilla extract for flavor.
-
In a separate bowl, combine the flour, baking powder, and salt. Gradually add this dry mixture to the creamed mixture, alternating with the milk. Mix until just combined; do not overmix.
-
Pour the batter evenly into the prepared pans and smooth the tops with a spatula.
-
Bake for 25-30 minutes, or until a toothpick inserted into the center comes out clean.
-
Allow the cakes to cool in the pans for 10 minutes, then transfer them to wire racks to cool completely.
-
For the frosting, beat together softened butter and cocoa powder until smooth. Gradually add powdered sugar and heavy cream until the frosting is fluffy and well-combined.
-
Once the cakes are completely cool, spread frosting between the layers and frost the top and sides of the cake.
-
Slice, serve, and enjoy your delicious birthday celebration cake!
Recipe Details
- Prep Time: 20 minutes
- Cook Time: 30 minutes
- Total Time: 50 minutes
- Servings: 12 slices
- Calories: Approximately 450 per slice
Tips, Storage & Variations
-
Tips: Ensure all ingredients are at room temperature for the best mixing results. Avoid overmixing the batter to keep the cake light and airy.
-
Storage: Store leftover cake in an airtight container at room temperature for up to 3 days, or refrigerate for up to a week.
-
Freezing: Wrap individual slices tightly in plastic wrap and freeze for up to 3 months. Thaw before serving.
-
Variations: Add a hint of citrus zest, such as lemon or orange, to the batter for a refreshing twist. You can also incorporate chocolate chips into the batter for added texture and flavor.
FAQ
Q1: Can I use cake flour instead of all-purpose flour?
A1: Yes, using cake flour will result in a lighter texture since it has a lower protein content.
Q2: How do I know when the cakes are done baking?
A2: Insert a toothpick into the center of the cake; if it comes out clean, the cakes are done.
Q3: Can I make this cake in advance?
A3: Yes, you can bake the cakes in advance and store them in the fridge for later decoration.
Q4: Is it possible to make this cake gluten-free?
A4: Yes, substitute all-purpose flour with a gluten-free flour blend that is suitable for baking.
Q5: How can I make the frosting less sweet?
A5: You can reduce the powdered sugar and add more cocoa powder or heavy cream to balance the flavors.
Q6: What is the best way to layer the cake?
A6: Level the tops of each cake layer with a serrated knife before frosting to ensure even stacking.
People Also Ask
Q1: What is the best way to frost a cake?
A1: Use an offset spatula for even application, and start with a crumb coat before the final layer of frosting.
Q2: Can I use milk alternatives in this recipe?
A2: Yes, almond milk or oat milk can be used instead of regular milk without affecting the taste significantly.
Q3: How long will the cake last on the counter?
A3: The frosted cake will last for about 3 days at room temperature, if stored properly.
Q4: Can I add sprinkles on top of the frosting?
A4: Absolutely! Sprinkles will add a festive touch and make the cake even more celebratory.
Q5: How do I make chocolate ganache for the cake?
A5: Heat equal parts of heavy cream and chocolate and stir until smooth to create a thick ganache for pouring over the cake.
Q6: Can I decorate this cake with fruits?
A6: Yes, adding fresh fruits like strawberries or raspberries on top of the frosting can enhance its presentation and flavor.
Conclusion
This Yellow Birthday Cake with Chocolate Frosting is bound to bring smiles and sweetness to your celebrations. Each bite is a delightful reminder of joyous moments shared with loved ones. We encourage you to try this recipe, savor its flavors, and share your creation with friends and family. Happy baking!
PrintYellow Birthday Cake with Chocolate Frosting
A classic yellow birthday cake with rich chocolate frosting, offering a delightful balance of buttery sweetness and deep chocolate richness.
- Prep Time: 20 minutes
- Cook Time: 30 minutes
- Total Time: 50 minutes
- Yield: 12 slices 1x
- Category: Dessert
- Method: Baking
- Cuisine: American
- Diet: Vegetarian
Ingredients
- 2 cups all-purpose flour
- 1 ½ cups granulated sugar
- ½ cup unsalted butter, softened
- 1 cup milk
- 3 ½ teaspoons baking powder
- 1 teaspoon vanilla extract
- ½ teaspoon salt
- 4 large eggs
- 1 cup unsweetened cocoa powder (for frosting)
- 1 cup unsalted butter, softened (for frosting)
- 4 cups powdered sugar
- ½ cup heavy cream
- 1 teaspoon vanilla extract (for frosting)
Instructions
- Preheat your oven to 350°F (175°C) and grease and flour two 9-inch round cake pans.
- Cream together the softened butter and granulated sugar until light and fluffy.
- Add the eggs one at a time, mixing well after each addition, then stir in the vanilla extract.
- Combine the flour, baking powder, and salt in a separate bowl. Gradually add this to the creamed mixture, alternating with milk.
- Pour the batter into the prepared pans and smooth the tops.
- Bake for 25-30 minutes, or until a toothpick comes out clean.
- Allow to cool in the pans for 10 minutes, then transfer to wire racks to cool completely.
- For frosting, beat together butter and cocoa powder, then gradually add powdered sugar and heavy cream until fluffy.
- Spread frosting between the layers and on top and sides of the cake.
- Slice, serve, and enjoy!
Notes
Ensure all ingredients are at room temperature for best results. Store leftover cake in an airtight container.
Nutrition
- Serving Size: 1 slice
- Calories: 450
- Sugar: 35g
- Sodium: 200mg
- Fat: 22g
- Saturated Fat: 10g
- Unsaturated Fat: 8g
- Trans Fat: 0g
- Carbohydrates: 62g
- Fiber: 2g
- Protein: 4g
- Cholesterol: 80mg