
Cheesecake Jars
Introduction
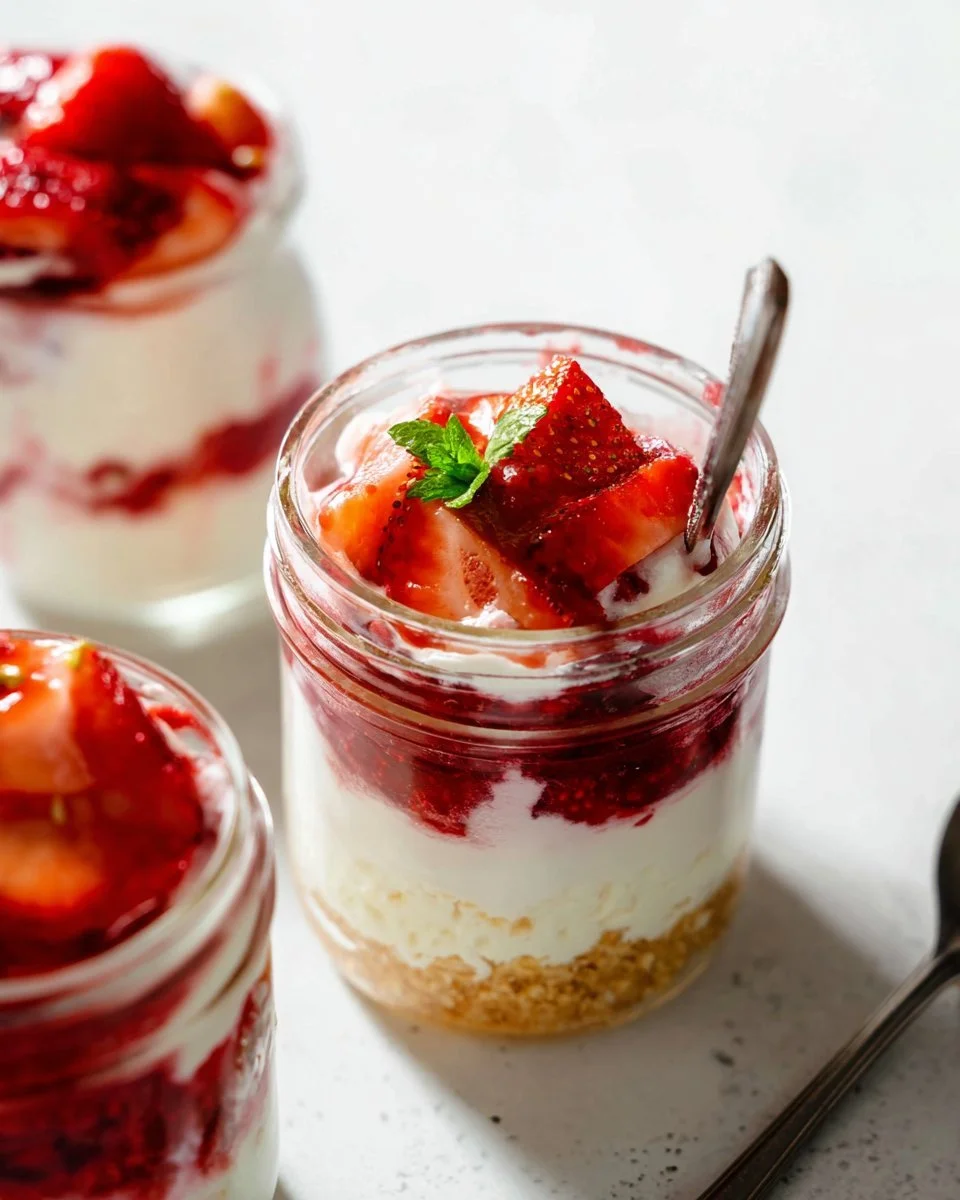
A simple, elegant dessert that tastes like classic cheesecake in a perfect single-serve package, Cheesecake Jars are creamy, light, and endlessly adaptable. The filling is rich and velvety, with a bright hint of lemon and warm vanilla, while the graham cracker crust adds a buttery, slightly crunchy contrast. The aroma is sweet and comforting, a mix of toasted crackers and vanilla that makes these jars irresistible the moment you open the fridge. They are ideal for potlucks, easy dinner party desserts, picnics, or when you want an impressive-looking sweet without baking. If you enjoy portable treats, you might also like a seasonal twist like the caramel apple cheesecake bars, which play on similar flavors in bar form.
Ingredients
- 2 tablespoons unsalted butter, melted — Adds fat to bind the graham cracker crumbs and gives the crust a rich, toasty flavor.
- 1 cup graham cracker crumbs — The base for the crust, use finely crushed crumbs for an even texture.
- 1 cup heavy cream, cold — Whipped into stiff peaks, this lightens the cream cheese base for a mousse-like filling.
- 8 ounces full-fat brick cream cheese, softened — The main cheesecake flavor and texture, softened so it blends smooth.
- 1/3 cup granulated sugar — Sweetens the cream cheese base; adjust slightly if you prefer less sweetness.
- 2 tablespoons sour cream, at room temperature — Adds tang and a silky mouthfeel to the filling.
- 1 teaspoon lemon juice — Brightens the filling and cuts some richness.
- 1/2 teaspoon pure vanilla extract — Rounds out flavors with warm vanilla notes.
- Toppings (your choice, such as fruit, chocolate sauce, or whipped cream) — Add just before serving for freshness and visual appeal. For inspiration that plays with playful mini servings, see gnome mini cheesecakes.
Step-by-Step Instructions
- Prepare your jars: Gather 6 clean 8-ounce jars or 10 clean 6-ounce jars and set them on a tray for easier transport to the fridge.
- Make the crust: Melt the unsalted butter in a small bowl. Add the graham cracker crumbs and stir until the mixture resembles wet sand. Press about 2 tablespoons of the mixture into the bottom of each jar, compacting gently with the back of a spoon or a small measuring cup to create an even base.
Tip: If your crumbs seem dry, add a teaspoon of melted butter at a time until they hold together. - Whip the cream: In a chilled bowl, whip the cold heavy cream until stiff peaks form. This will give the filling a light, airy texture.
- Beat the cream cheese base: In a separate bowl, beat the softened cream cheese with the sugar, sour cream, lemon juice, and vanilla until completely smooth and lump-free. Scrape the sides of the bowl as needed to avoid lumps.
- Fold in the whipped cream: Gently fold the whipped cream into the cream cheese mixture in two additions, folding until just combined to keep the mixture light and fluffy.
- Layer the filling: Spoon or pipe the filling into the jars over the prepared crust, filling to near the top and smoothing the surface.
Tip: For a decorative touch, pipe the final swirl or add a thin layer of graham crumbs between layers. - Chill: Refrigerate the jars for at least 30 minutes to let the filling set. They will hold well chilled for up to 3 days before serving.
- Serve: Add your chosen toppings just before serving, such as fresh fruit, a drizzle of chocolate sauce, or a dollop of whipped cream. For a different method using jars and minimal oven time, you may enjoy techniques used in a burnt Basque cheesecake loaf preparation.
Recipe Details
- Prep Time: 15 minutes
- Cook Time: 0 minutes
- Total Time: 45 minutes including chilling
- Servings: 6 jars of 8 ounces each, or 10 jars of 6 ounces each
- Calories: Approximately 420 kcal per 8-ounce jar, or 255 kcal per 6-ounce jar
Tips, Storage & Variations
- Practical tips: Use room temperature cream cheese for a lump-free base. Chill your bowl and beaters for the heavy cream to whip faster and hold stiffer peaks. Press the crust firmly so it does not crumble when scooping.
- Storage: Store assembled jars in the refrigerator for up to 5 days. Add fresh toppings only when ready to serve to keep them bright and textured.
- Freezing: You can freeze jars without fresh toppings for up to 1 month. Thaw overnight in the refrigerator before serving and add toppings after thawing.
- Flavor variations using only the ingredients listed: Top with sliced fresh fruit for brightness, spoon chocolate sauce over the filling for richer flavor, or add a swirl of extra whipped cream on top for more airiness. For a playful pairing, consider serving alongside recipes like caramel apple cheesecake bars to offer complementary textures and flavors.
FAQ
- Can I make these jars ahead of time?
Yes, you can assemble and chill the jars up to 3 days ahead. Add toppings just before serving. - Do I need to bake these?
No, this is a no-bake cheesecake jar recipe, so no oven is required. - Can I use low-fat cream cheese or cream?
You can, but the texture and richness will be lighter. Full-fat produces the creamiest result. - How do I prevent lumps in the cream cheese mixture?
Beat the softened cream cheese until smooth, and scrape the bowl sides. Room temperature cream cheese helps eliminate lumps. - How long do leftover jars keep in the fridge?
Store leftovers in the refrigerator for up to 5 days in a covered container.
People Also Ask
- How many jars does this recipe make?
This recipe makes either 6 jars of 8 ounces or 10 jars of 6 ounces depending on jar size. - What is the easiest way to crush graham crackers?
Place crackers in a sealed plastic bag and crush with a rolling pin, or pulse in a food processor until fine. - Can I swap sour cream for yogurt?
You may use plain yogurt as a substitute, but expect a slightly different tang and texture. - Why whip the cream separately?
Whipping the cream separately and folding it in yields a lighter, mousse-like texture in the filling. - Can I use other cookie crumbs for the crust?
Yes, you can use other crumbs, but this recipe’s quantity is based on graham cracker crumbs. - Is lemon juice necessary?
Lemon juice brightens the filling and balances the sweetness, but you can reduce it if you prefer a milder tang.
Conclusion
These Cheesecake Jars are a fuss-free, elegant dessert that delivers classic cheesecake flavor with minimal effort and no baking required. They are perfect for make-ahead entertaining and adaptable to any topping you prefer. If you want other jar-based ideas, check out this take on No-Bake Cheesecake Jars at Sally’s Baking Addiction for inspiration, or explore a different cooking approach with this slow cooker cheesecake in a jar at Sprinkle Bakes. I hope you enjoy making and sharing these jars with friends and family, and that they become a go-to dessert for your gatherings.
PrintCheesecake Jars
A simple, elegant no-bake dessert that captures the classic cheesecake flavor in a portable jar, perfect for any occasion.
- Prep Time: 15 minutes
- Cook Time: 0 minutes
- Total Time: 45 minutes
- Yield: 6 servings 1x
- Category: Dessert
- Method: No-Bake
- Cuisine: American
- Diet: Vegetarian
Ingredients
- 2 tablespoons unsalted butter, melted
- 1 cup graham cracker crumbs
- 1 cup heavy cream, cold
- 8 ounces full-fat brick cream cheese, softened
- 1/3 cup granulated sugar
- 2 tablespoons sour cream, at room temperature
- 1 teaspoon lemon juice
- 1/2 teaspoon pure vanilla extract
- Toppings (your choice, such as fruit, chocolate sauce, or whipped cream)
Instructions
- Prepare your jars: Gather 6 clean 8-ounce jars or 10 clean 6-ounce jars and set them on a tray for easier transport to the fridge.
- Make the crust: Melt the unsalted butter in a small bowl. Add the graham cracker crumbs and stir until the mixture resembles wet sand. Press about 2 tablespoons of the mixture into the bottom of each jar, compacting gently with the back of a spoon or a small measuring cup to create an even base.
- Tip: If your crumbs seem dry, add a teaspoon of melted butter at a time until they hold together.
- Whip the cream: In a chilled bowl, whip the cold heavy cream until stiff peaks form. This will give the filling a light, airy texture.
- Beat the cream cheese base: In a separate bowl, beat the softened cream cheese with the sugar, sour cream, lemon juice, and vanilla until completely smooth and lump-free. Scrape the sides of the bowl as needed to avoid lumps.
- Fold in the whipped cream: Gently fold the whipped cream into the cream cheese mixture in two additions, folding until just combined to keep the mixture light and fluffy.
- Layer the filling: Spoon or pipe the filling into the jars over the prepared crust, filling to near the top and smoothing the surface.
- Tip: For a decorative touch, pipe the final swirl or add a thin layer of graham crumbs between layers.
- Chill: Refrigerate the jars for at least 30 minutes to let the filling set. They will hold well chilled for up to 3 days before serving.
- Serve: Add your chosen toppings just before serving, such as fresh fruit, a drizzle of chocolate sauce, or a dollop of whipped cream.
Notes
Use room temperature cream cheese for a lump-free base and chill your equipment for better whipping results.
Nutrition
- Serving Size: 1 jar
- Calories: 420
- Sugar: 22g
- Sodium: 250mg
- Fat: 32g
- Saturated Fat: 18g
- Unsaturated Fat: 10g
- Trans Fat: 0g
- Carbohydrates: 29g
- Fiber: 1g
- Protein: 4g
- Cholesterol: 60mg